Friday, October 9, 2015

Monday, September 28, 2015

Successful Microbiological Investigations

Successful Microbiological Investigations
Sharing an interesting article which was printed in the March 2011 issue of American Pharmaceutical Review - Volume 14, Issue 2. This will give some idea on microbiological investigations. 

Author Biography
Dr. Scott Sutton earned his B.S. in Genetics from the University of California at Davis, and his Masters and Ph.D. in Microbiology from the University of Rochester (Rochester, NY). After an NIH postdoctoral fellowship at the Medical College of Virginia (Richmond, VA), he went to work for Bausch and Lomb (Rochester, NY) until 1994 when he accepted a position at Alcon Laboratories (Fort Worth, TX). Dr. Sutton left Alcon Laboratories in 2004 as a Director in the R&D division to accept a position as Pharma Consultant (Microbiology) with Vectech Pharmaceutical Consultants, Inc which he left in 2009 as Sr. Director, Microbiology Services.

Scott Sutton is the Principal of Microbiology Network, Inc, a company he started in 1996 as a means to encourage training and communications within the microbiological community. He is a recognized consultant and trainer with emphasis in GMP, investigations, Environmental Monitoring and contamination control (both Aseptic manufacturing and non-sterile production facilities) and microbiology laboratory audits and operations. The Microbiology Network supplies consulting, training, webinars and Email discussion groups (PMFList, PSDGList and C-CEList) Dr. Sutton is an active author and speaker for the industry, supports PDA and has served with the USP Analytical Microbiology Committee of Experts since 1993.
Pls click the below Link to read the article :
                  https://sites.google.com/site/pharmaqclabs/successful-microbiological-investigations
 

Wednesday, September 23, 2015

How to operate an electronic balance?

Operation of Electronic balance


Micro, semi micro and analytical balances are measuring  instruments  of the highest precision. The following points will help us obtain reliable weighing results rapidly.

a. Leveling
    Check the air bubble is in the center of the level and if necessary correct this by turning the     leveling feet. Then calibrate the balance.


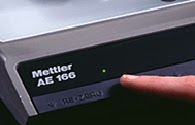
b. Turn the balance on by pressing the control bar. The display lights up for several seconds,       then resets to 0.0000. Then calibrate the balance.


c. Place creased, small weighing paper on the balance pan.


d. Close the sliding glass doors. Wait for the green dot on the left to go out. This is the        
    stability indicator light, indicating that the weight is stable.


e. Press the control bar to cancel out the weight of the container or paper. The display will 
    again read 0.0000.


f. Clean-up
      Use the brush provided to clean spills in the weighing chamber. Discard any disposable tare     
      containers, weighing paper, or Kimwipes in the nearest wastebasket.


Precautions 
  1. Don't pick up tare containers with bare hands since your fingerprints add mass. Use Kimwipes or tongs to prevent this.
  2. Don't lean on the bench while weighing.
  3. Do record the mass of your container, if you will need it later.
  4. Do check the level indicator bubble before weighing. The two rear balance feet serve as leveling screws.
  5. Do not bump or place objects on the bench after zeroing the balance.
  6. Mass powders on paper or dishes. Handle objects with tongs, tweezers, gloves, or paper to prevent fingerprints.
  7. Let hot objects cool before massing.
  8. Mass hygroscopic materials rapidly since they will absorb water during massing.
  9. When making repetitive massing always use the same procedure.
  10. DO NOT go off and leave spilled chemicals on or around the balance! Report any spill to the instructor so that he/she may clean it up in a proper manner, re-calibrating if necessary.